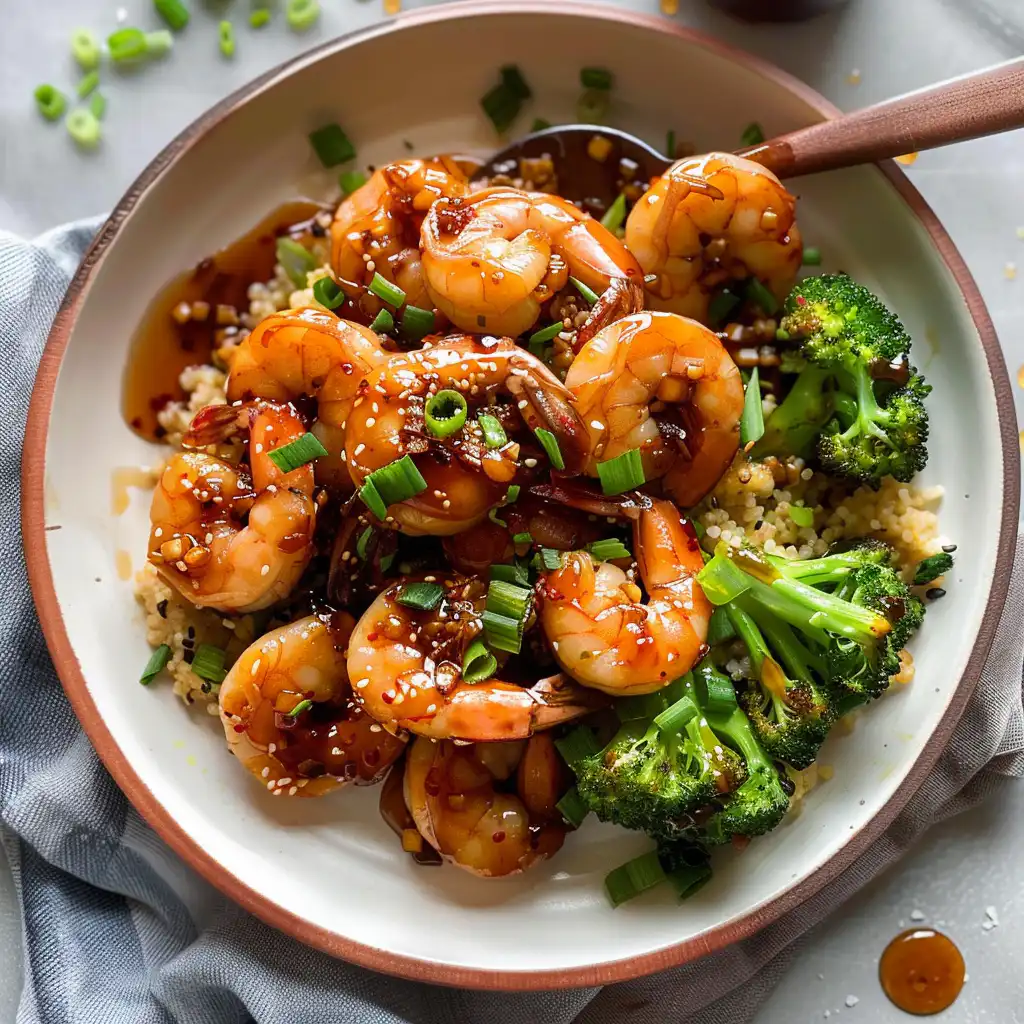
This honey garlic shrimp recipe delivers restaurant-quality results in just minutes. The sweet and savory glaze coats tender shrimp while providing substantial protein for a satisfying meal. I’ve been making this dish for years, and it never fails to impress both family and dinner guests.
Why This High-Protein Honey Garlic Shrimp Works
The combination of honey’s natural sweetness with garlic’s aromatic depth creates a balanced flavor profile that enhances rather than masks the shrimp’s delicate taste. Quick cooking preserves the shrimp’s tender texture while the glaze caramelizes beautifully in the pan.
Ingredients
• 2 pounds large shrimp (21-25 count), peeled and deveined
• 3 tablespoons olive oil
• 6 cloves garlic, minced
• 1/3 cup honey
• 3 tablespoons low-sodium soy sauce
• 2 tablespoons rice vinegar
• 1 tablespoon cornstarch
• 2 tablespoons water
• 1/2 teaspoon red pepper flakes (optional)
• 1/2 teaspoon ground ginger
• 2 green onions, sliced thin
• 1 tablespoon sesame seeds
• Salt and black pepper to taste
• 2 tablespoons fresh cilantro, chopped
These ingredients create layers of flavor while keeping the ingredient list manageable for busy weeknight cooking.
How to Make It
1. Pat the shrimp completely dry with paper towels and season with salt and pepper. This step ensures proper searing and prevents the glaze from becoming watery.
2. Heat olive oil in a large skillet or wok over medium-high heat until it shimmers but doesn’t smoke. The right temperature is crucial for achieving that golden exterior.
3. Add the shrimp to the hot pan in a single layer, working in batches if necessary to avoid overcrowding. Cook for 2 minutes without moving them to develop a nice sear.
4. Flip the shrimp and cook for another 1-2 minutes until they turn pink and opaque. Remove shrimp to a plate and set aside.
5. In the same pan, reduce heat to medium and add minced garlic. Sauté for 30 seconds until fragrant, being careful not to burn it.
6. Whisk together honey, soy sauce, rice vinegar, and ground ginger in a small bowl. Pour this mixture into the pan with the garlic.
7. Bring the sauce to a gentle simmer and let it cook for 2-3 minutes, allowing the flavors to meld and the sauce to reduce slightly.
8. Mix cornstarch and water in a small bowl to create a slurry. Stir this into the simmering sauce to thicken it.
9. Return the cooked shrimp to the pan and toss to coat evenly with the glaze. Cook for another minute to heat through.
10. Remove from heat and sprinkle with red pepper flakes, sliced green onions, sesame seeds, and fresh cilantro before serving.
This method ensures the shrimp stay tender while developing a beautiful glaze that clings to each piece.
Nutrition at a Glance
• High in protein: Over 35 grams per serving supports muscle maintenance and satiety
• Low in calories: Approximately 280 calories per serving makes it diet-friendly
• Good source of selenium: Supports immune function and thyroid health
• Contains omega-3 fatty acids: Promotes heart and brain health
• Rich in vitamin B12: Essential for nerve function and red blood cell formation
• Low in saturated fat: Heart-healthy preparation method
• Provides iron and zinc: Important minerals for energy and immune support
• Natural antioxidants from garlic: May support cardiovascular health
• Quick-cooking method preserves nutrients better than longer cooking times
Don’t miss this delicious recipe: Protein Honey Garlic Shrimp
How to Serve It
• Over steamed jasmine rice or brown rice for a complete meal
• With cauliflower rice for a low-carb option that soaks up the sauce
• Alongside roasted vegetables like broccoli, asparagus, or bell peppers
• Over rice noodles or zucchini noodles for an Asian-inspired twist
• With a simple green salad dressed with sesame oil and rice vinegar
• As an appetizer with toothpicks for parties and gatherings
• Stuffed into lettuce wraps for a light, refreshing meal
• Over quinoa for additional protein and fiber
The versatility of this dish makes it suitable for everything from quick weeknight dinners to elegant entertaining.
Common Mistakes
• Overcooking the shrimp leads to a rubbery texture that’s unpleasant to eat
• Not patting shrimp dry results in steaming rather than searing
• Burning the garlic creates bitter flavors that overpower the dish
• Adding shrimp back to the pan too early can make them tough
• Using too much cornstarch makes the sauce gummy instead of glossy
• Not heating the pan adequately prevents proper caramelization
• Crowding the pan causes uneven cooking and prevents browning
• Skipping the resting time doesn’t allow flavors to develop properly
Avoiding these pitfalls ensures consistent results every time you make this recipe.
Storage and Reheating
• Store leftovers in the refrigerator for up to 3 days in an airtight container
• Reheat gently in a skillet over low heat to prevent overcooking the shrimp
• Add a splash of water or broth if the sauce seems too thick after refrigeration
• Microwave on 50% power in 30-second intervals, stirring between each interval
• Don’t freeze cooked shrimp as the texture becomes mushy when thawed
• Store sauce separately if possible to maintain the best texture
• Consume within 24 hours for optimal flavor and food safety
• Bring to room temperature for 10 minutes before reheating for even warming
Proper storage techniques help maintain the dish’s quality and extend its enjoyment.

Leftover Ideas
• Chop and add to fried rice with scrambled eggs and vegetables
• Toss with cooked pasta and a splash of pasta water for a quick meal
• Use as a protein topping for grain bowls with fresh vegetables
• Add to stir-fried vegetables for a complete one-pan meal
• Serve cold over mixed greens as a protein-rich salad
• Wrap in tortillas with avocado and cabbage slaw for fusion tacos
• Mix into ramen bowls for added protein and flavor depth
• Combine with cream cheese and herbs for a party dip
These creative uses ensure no delicious shrimp goes to waste while providing variety in your meal planning.
PrintKool-Aid Slushie
- Total Time: 5 minutes
- Yield: 4 servings 1x
- Diet: Vegetarian
Description
A refreshing, icy frozen drink made with Kool-Aid, ice, and sugar that’s perfect for hot summer days. Ready in just 5 minutes with simple ingredients.
Ingredients
- 4 cups ice cubes
- 1 packet Kool-Aid drink mix (unsweetened)
- 1 cup granulated sugar
- 2 cups cold water
- 2 tablespoons lemon juice (optional)
Instructions
- 1. Add ice cubes to the blender first, followed by the cold water.
- 2. Sprinkle the Kool-Aid packet and sugar over the ice and water mixture. Add lemon juice if using.
- 3. Secure the blender lid tightly and start blending on low for 10 seconds to break up the ice.
- 4. Gradually increase speed to high and blend for 30-45 seconds until smooth and slushy.
- 5. Check consistency and adjust if needed by adding more ice for thickness or water if too thick.
- 6. Pour immediately into pre-chilled glasses and serve right away.
Notes
For best results, use very cold water and serve immediately. Leftovers can be frozen in an airtight container for up to 2 weeks. To re-use, let thaw slightly and scrape with a fork. Try mixing different Kool-Aid flavors or adding fresh fruit for variation.
- Prep Time: 5 minutes
- Cook Time: 0 minutes
- Category: Beverages
- Method: Blending
- Cuisine: American
Nutrition
- Serving Size: 1 cup
- Calories: 120
- Sugar: 30g
- Sodium: 15mg
- Fat: 0g
- Carbohydrates: 31g
- Fiber: 0g
- Protein: 0g