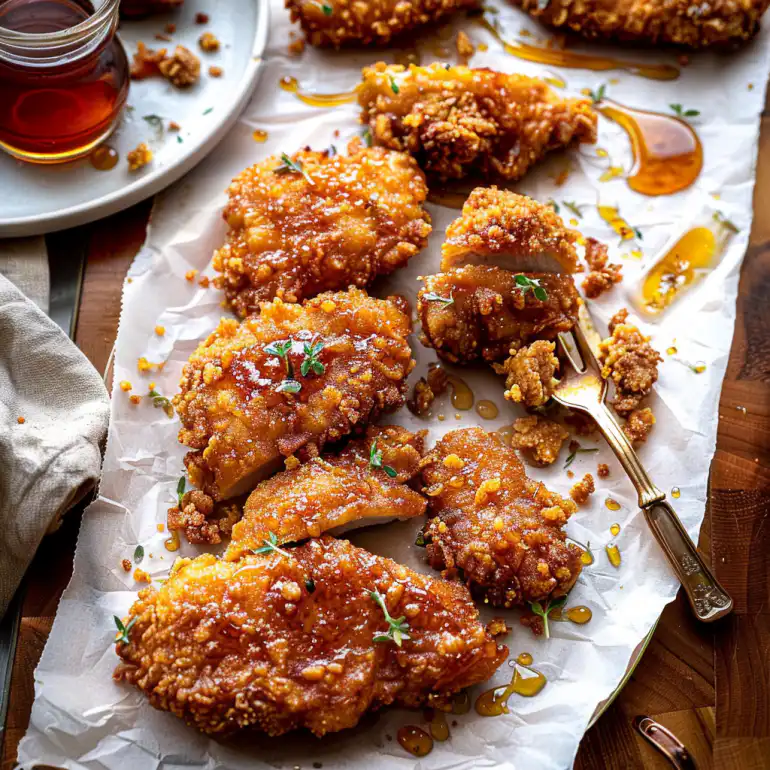
This baked crunchy hot honey chicken has become my go-to recipe when I need something that satisfies both comfort food cravings and busy weeknight schedules. The combination of crispy coating and sweet-spicy glaze creates layers of flavor that keep everyone coming back for seconds, while the baking method keeps things simple and hands-off.
Why This Baked Crunchy Hot Honey Chicken Works
The secret lies in the double coating technique that creates an incredibly crunchy exterior without deep frying. By combining panko breadcrumbs with seasoned flour and using a buttermilk base, you get restaurant-quality crispiness from your home oven. The hot honey glaze adds the right balance of sweetness and heat that complements rather than masks the chicken.
Ingredients
- 2 pounds boneless, skinless chicken thighs, cut into bite-sized pieces
- 1 cup buttermilk
- 2 large eggs
- 1½ cups all-purpose flour, divided
- 2 cups panko breadcrumbs
- 1 teaspoon garlic powder
- 1 teaspoon onion powder
- 1 teaspoon smoked paprika
- 1 teaspoon salt
- ½ teaspoon black pepper
- ½ teaspoon cayenne pepper
- ⅓ cup honey
- 3 tablespoons hot sauce (like Frank’s RedHot)
- 2 tablespoons apple cider vinegar
- 1 tablespoon butter
- Cooking spray or olive oil
These ingredients work together to create multiple layers of flavor and texture, from the tender marinated chicken to the crispy coating and glossy glaze.
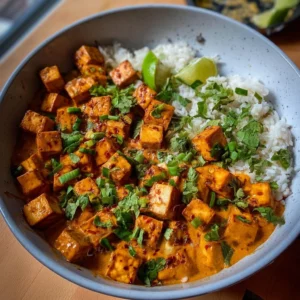
A recipe worth trying : Hot Honey Chicken Bowl
How to Make It
- Preheat your oven to 425°F and line a large baking sheet with parchment paper. Spray generously with cooking spray.
- Cut the chicken thighs into uniform pieces, about 1½ inches each. This ensures even cooking and consistent bite-sized portions.
- In a large bowl, whisk together buttermilk and eggs. Add the chicken pieces and let them marinate for at least 15 minutes, or up to 2 hours in the refrigerator.
- Set up your breading station with three shallow dishes. In the first, combine ¾ cup flour, garlic powder, onion powder, smoked paprika, salt, black pepper, and cayenne pepper.
- In the second dish, place the remaining ¾ cup flour. In the third dish, add the panko breadcrumbs.
- Remove chicken pieces from the buttermilk mixture, allowing excess to drip off. Dredge each piece first in the seasoned flour mixture, then the plain flour, and finally the panko breadcrumbs, pressing gently to help the coating adhere.
- Arrange the coated chicken pieces on the prepared baking sheet, making sure they don’t touch each other. This allows air to circulate and creates maximum crispiness.
- Spray the tops of the chicken pieces lightly with cooking spray or drizzle with a small amount of olive oil.
- Bake for 20-25 minutes, flipping halfway through, until the coating is golden brown and the internal temperature reaches 165°F.
- While the chicken bakes, prepare the hot honey glaze by combining honey, hot sauce, apple cider vinegar, and butter in a small saucepan over medium heat. Whisk until smooth and let it simmer for 2-3 minutes until slightly thickened.
- Remove the chicken from the oven and immediately brush or drizzle with the hot honey glaze while still hot.
- Let rest for 2-3 minutes before serving to allow the glaze to set slightly.
This method creates incredibly crispy chicken with a sticky, flavorful glaze that brings together all the elements for a satisfying meal.
Nutrition at a Glance
- High in protein from the chicken thighs, supporting muscle health and satiety
- Moderate calorie content when baked rather than fried
- Contains B vitamins, particularly niacin and B6 from the chicken
- Provides selenium and phosphorus for bone health
- Natural sugars from honey offer quick energy
- Buttermilk adds probiotics and calcium
- Spices provide antioxidants and anti-inflammatory compounds
- Lower in saturated fat compared to traditional fried versions
How to Serve It
- Over fluffy white rice with steamed broccoli for a complete meal
- Alongside creamy coleslaw and cornbread for a Southern-style dinner
- With roasted sweet potato wedges and a simple green salad
- Over cauliflower rice for a lower-carb option
- As an appetizer with ranch or blue cheese dipping sauce
- In soft flour tortillas with shredded lettuce and diced tomatoes
- Over a bed of mixed greens for a hearty chicken salad
The versatility of this chicken makes it suitable for casual family dinners or slightly more dressed-up occasions when you want something special but approachable.
Common Mistakes
- Overcrowding the baking sheet, which creates steam and prevents proper crisping
- Skipping the marinating step, which results in less flavorful and potentially drier chicken
- Not pressing the breadcrumb coating firmly enough, leading to coating that falls off during baking
- Opening the oven door too frequently, which causes temperature fluctuations
- Applying the glaze too early, which can make the coating soggy
- Using chicken breasts instead of thighs, resulting in drier meat
- Not letting the chicken rest after glazing, preventing the glaze from setting properly
- Cutting pieces too large or too small, affecting cooking time and texture
Avoiding these common pitfalls ensures you get the crispy, flavorful results you’re looking for every time you make this recipe.
Storage and Reheating
- Store leftovers in the refrigerator for up to 3 days in an airtight container
- Freeze cooked chicken for up to 2 months, though the coating may lose some crispiness
- Reheat in a 375°F oven for 8-10 minutes to restore crispiness
- Avoid microwaving, which makes the coating soggy
- Let frozen chicken thaw completely in the refrigerator before reheating
- Store any leftover glaze separately in the refrigerator for up to one week
- For best results, reheat only the amount you plan to eat immediately
Proper storage and reheating techniques help maintain the texture and flavor that make this dish so appealing.

Leftover Ideas
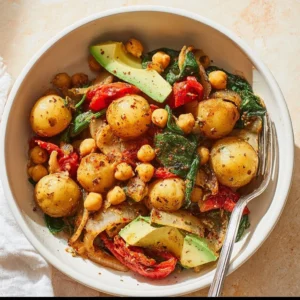
- Chop and add to grain bowls with quinoa, roasted vegetables, and avocado
- Use in chicken salad with diced celery, grapes, and a light mayo dressing
- Add to ramen bowls for extra protein and flavor
- Incorporate into fried rice with vegetables and scrambled eggs
- Make chicken quesadillas with cheese and sautéed peppers
- Top pizza with the chopped chicken, red onions, and mozzarella
- Create chicken wraps with fresh vegetables and ranch dressing
- Add to pasta salad for potluck gatherings
These leftover applications help stretch the recipe across multiple meals while keeping things interesting and varied throughout the week.
Kool-Aid Slushie
- Total Time: 5 minutes
- Yield: 4 servings 1x
- Diet: Vegetarian
Description
A refreshing, icy frozen drink made with Kool-Aid, ice, and sugar that’s perfect for hot summer days. Ready in just 5 minutes with simple ingredients.
Ingredients
- 4 cups ice cubes
- 1 packet Kool-Aid drink mix (unsweetened)
- 1 cup granulated sugar
- 2 cups cold water
- 2 tablespoons lemon juice (optional)
Instructions
- 1. Add ice cubes to the blender first, followed by the cold water.
- 2. Sprinkle the Kool-Aid packet and sugar over the ice and water mixture. Add lemon juice if using.
- 3. Secure the blender lid tightly and start blending on low for 10 seconds to break up the ice.
- 4. Gradually increase speed to high and blend for 30-45 seconds until smooth and slushy.
- 5. Check consistency and adjust if needed by adding more ice for thickness or water if too thick.
- 6. Pour immediately into pre-chilled glasses and serve right away.
Notes
For best results, use very cold water and serve immediately. Leftovers can be frozen in an airtight container for up to 2 weeks. To re-use, let thaw slightly and scrape with a fork. Try mixing different Kool-Aid flavors or adding fresh fruit for variation.
- Prep Time: 5 minutes
- Cook Time: 0 minutes
- Category: Beverages
- Method: Blending
- Cuisine: American
Nutrition
- Serving Size: 1 cup
- Calories: 120
- Sugar: 30g
- Sodium: 15mg
- Fat: 0g
- Carbohydrates: 31g
- Fiber: 0g
- Protein: 0g
1 thought on “Baked Crunchy Hot Honey Chicken Recipe – Crispy & Easy”